XenServer Security: Clearing CIFS/SMB Passwords

XenServer stores the passwords to any CIFS/SMB share you are currently using or have used in the past even if the share was removed. (Tested this up to XenServer 7.)

Now, this can be a concern because these credentials might be to a domain account, domain administrator account, or have privileged access to a specific system. I wrote the following command to go through and clear all of the stored CIFS/SMB shares.

xe secret-list | grep uuid | cut -c 17- | xargs -I {Var} xe secret-destroy uuid={Var}

This query’s all existing passwords, removes the unnecessary text, and removes the saved passwords.

Breakdown

xe secret-list

Lists all passwords and UUIDs.

xe secret-list | grep uuid

Lists just the UUIDs of existing CIFS passwords

cut -c 17-

Removes the excess characters of the “xe secret-list | grep uuid” command.

xargs -I {Var}

Passes the results of the previous command to the next one with a set variable, in this case “{Var}”

xe secret-destroy uuid=

Removes the password from “xe secret-list”

Remote DNS Configuration (Windows)

In the event that you need to update the DNS on a domain computer that you do not have physical access to and the users do not have local admin privileges, this might help.

You will need to start by downloading the PSTools suite from Microsoft onto a computer that has local network access or over a VPN.

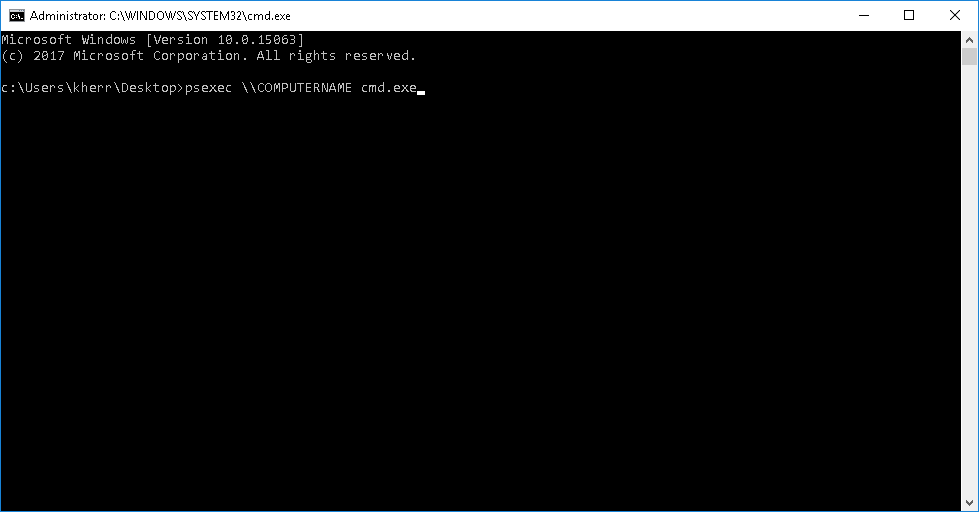
From there you will need to extract the PSExec.exe application and open an administrative command prompt (Domain Administrator credentials) in that folder.

  • Next you will need to run the PSExec application as seen below.
    psexec \\COMPUTERNAME cmd.exe
  • COMPUTERNAME should be replaced with the name of the computer you want to connect to. 
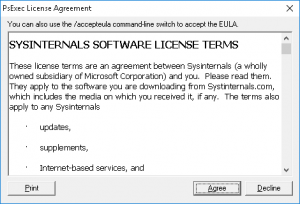
  • If this is your first time running the application you will likely need to accept the license.

If done properly this will launch a command prompt on the computer you need. If not, it will tell you that it failed.

The next steps are to get the name of the interface you want to change and then update DNS.

  • netsh interface show interface
    • This will get the names of your network adapters, in this case “Local Area Connection”
  • netsh interface ipv4 add dnsserver “Local Area Connection” address=192.168.x.x index=1
    netsh interface ipv4 add dnsserver “Local Area Connection” address=192.168.x.x index=2

The user at the computer should be able to access the internet again after this has been successfully completed.


Cisco 871 Router: Quickly Change the ISP

Putty into the 871 Router

Run the command “Show Run” to start scrolling through and get the outside IP Interface, IP Address and Subnet Mask.

interface FastEthernet4
ip address %CurrentIPAddress% %CurrentIPSubnet%
!

Scroll further and get the IP Route (Gateway Address)

ip route 0.0.0.0 0.0.0.0 %CurrentGatewayIP%

Prpare a short script to remove the old ISP settings and add the new ISP settings.
Start with the Gateway (IP ROUTE).
Example below between the hypens.e

no ip route 0.0.0.0 0.0.0.0 %CurrentGatewayIP%
ip route 0.0.0.0 0.0.0.0 %NewGatewayIP%

interface FastEthernet4
no ip address %CurrentIPAddress%  %CurrentIPSubnet%
ip address %NewIPAddress% %NewIpAddressSubnet%
!
Run the command “Conf T

Copy and paste entire script into Putty.

Once internet is verified up and running, “Exit” out of Config mode.

Run the command “Write Mem

XenServer: Rogue/Missing/Invisible Virtual Machine

Yesterday, I had the pleasure of finding out that there was an invisible/missing/rogue VM on one of the servers in our pool.

We had a “dead-beef” issue a few weeks prior and had attempted to migrate our VMs off to other members of the pool before rebooting the member. With that attempt, it caused all of the VMs to go into a paused state from which a forced shutdown was required. We rebooted the server at that point because it was the only way we could get the “dead-beef” issue recovered.

After the pool member reboot, the VMs would not start, so we cloned them and booted them up. Everything seemed fine in the next few weeks, until I decided to delete the originals as the replacements appeared to be functioning fine.

One of those servers had apparently been running in the background even though XenServer showed it as off.

We could ping it, see a MAC address for it that didn’t match the server it should have been, etc. Though, it didn’t show up in any VM list, be it from the XenCenter console, or through the “xe vm-list” command.

Later, we discovered that there was an extra domain (command: list_domains) on one of the servers. It’s possible that it could have been fixed by destroying that domain, but we ended up rebooting the entire pool. I started with that pool member after shutting down / migrating the existing VMs and placing it into Maintenance Mode.

The rogue server stopped responding pretty much immediately at this point and when it came back up it was no longer an issue.

TL;DR – Apparently, sometimes a server can be running in XenServer with nearly no record of it’s existence after being deleted in a “powered off” state.

Helping Out

I’ve spent a lot of time scouring the internet for solutions in my life. Sometimes I needed to piece multiple things together from multiple sources to get a decent fix. I have been documenting these things but I haven’t had a place to share them and I feel like other people could benefit from some simplified resources.

It’s my turn to give something back to the community that has helped me develop my career.